
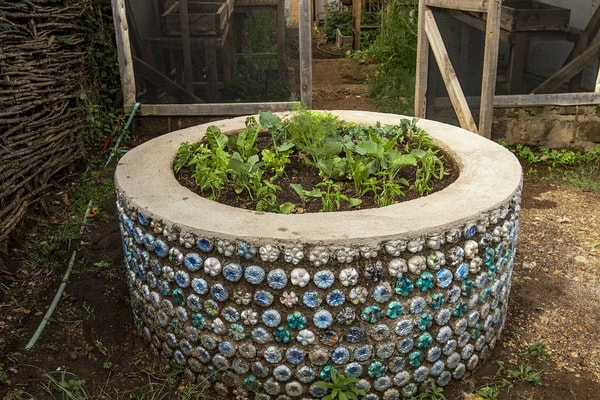
Creating an Ecobrick
(photo credit: https://www.cedarwoodtrust.com/ecobricks.html)
Save the date: On July 19th, from 1 to 2 pm, the Dungeness River Nature Center will be hosting an Eco-brick Building Party! Led by AmeriCorps Educator Eden Voebel, the group will be taught how to build eco-bricks while connecting with others in the community.
In our last article, we reviewed what eco-bricks are and why they are important. We will learn about what kinds of materials can be put into eco-bricks, and how to create them for yourself at home!
According to the Global Eco-brick Alliance, there are 10 steps involved in the eco-bricking process. For our project here at the Dungeness River Nature Center, we will be slightly modifying things:
Step 1: Separate, Clean, Dry, and Save
- Separate your plastic scraps from paper, glass, metal, and biodegradable products
- It is important to clean your plastic scraps! Plastic with food remnants can lead to bacterial growth and the build-up of methane gas
- Once washing off your plastic, you should leave it to air dry before packing it into your chosen container
- Once the plastic is dry, you can either save your plastic or begin to build your eco-brick

Step 2: No Glass, Metal, or Biodegradables
- One of the reasons why we create eco-bricks is to prevent microplastics and toxins from breaking down into the environment
- Sharp metal or glass can puncture an eco-brick! There are other places in our community where you can recycle these materials
- Things that should NOT go in an eco-brick: cloth, paper, cardboard, metal, glass, or any organic materials
- Tip: Plastic that has a paper sticker is allowed to go in eco-bricks! Just keep the amount of paper to a minimum

Step 3: Choose your Bottle/Carton
- When choosing a receptacle for your project, it is important to consider its availability.
- It is important to use similar containers so that they can fit together when building
- For this project, you can use half-gallon cartons or clear plastic bottles

Step 4: Choose your Stick/Packing Tool
- Bamboo and wood polls make the best packing tools, but you can use anything that will fit the diameter of your container opening
- With a bottle, it is best to have your tool be ⅓ the size of its opening
- Make sure that your tool or stick is not sharp! If it punctures a whole in the eco-brick, you will unfortunately have to start over again

Step 5: Pack the First Layer of your Eco-brick
- In the beginning, it is best to start with a softer plastic. This will allow for the plastic to conform to the bottom of the bottle’s “legs” or dimples at the bottom
- Fill your container halfway, and use your stick to compress and pack it down
- Tip: you can start an eco-brick bottle with colored plastics! Sometimes this is implemented to create colorful designs when using them as building materials

Step 6: Begin to Pack your Eco-brick!
- The smaller the pieces of plastic, the denser the eco-brick will be!
- If you have larger pieces of plastic, you can cut them into the size of around a business card
- Fill your container halfway, then compress the loose plastic around the edges and center
- Make sure to mix both soft and hard plastics to maximize the eco-bricks density

Step 7: Weigh your Eco-brick to Ensure Quality
- Strong eco-bricks are densely packed, have no air pockets, and have no spaces within the pieces of plastic
- Density must be higher than 0.33 g/ml, and no greater than 0.70 g/ml. This guarantees that they are strong enough for building, but not too heavy when built into modules
Step 8: Cap/Close your Eco-brick
- Your eco-brick needs to be full, but NOT overflowing
- There should be about 1 to 2 cm of room between the cap and the compressed plastic
- If plastic is touching the bottle caps, it can cause them to crack years down the line
- Tip for cartons: Once full and tight, fold the top of the carton closed and tape the carton closed with plastic packing tape.
Step 9: Turn in your eco-bricks to the River Center
- Once you have completed your eco-brick, you can bring it to the staff office at the River Center
- The River Center will be in charge of logging and inscribing the eco-bricks
- Each eco-brick created (about the size of a half-gallon carton) earns you ONE entry into our raffle for a DRNC hoodie!
Here is a video from the Global Eco-brick Alliance on how to build an eco-brick!:
(Source: https://ecobricks.org/en/how.php)